Showing posts with label diy. Show all posts

Thursday, December 15, 2011

#13 and #14 Easy pop up Christmas card + Kix garland.

#13 Easy pop up Christmas card

This would be my second time making a pop up card.
The first card I made was for my sister's birthday.
I only wish I would have taken pictures of it!
Oh well, now I have a whole tutorial on how to make one.
I included this card with the gift that I made for the gift exchange.
The first thing to do is get a piece of white paper and a piece of construction paper.
You can use any color of construction paper.
(I chose blue paper, then changed my mind and used red.)
Next, I cut some slits into the white paper where the fold is.

Then you open the card and extend those tabs and glue the white paper to the construction paper.

This is where the decorating comes in.
I cut out some Christmas tree's out of card stock and had Levi make me a banner.

Then, I glued them to those tabs and they looked like this:

I also added some confetti around the edges.
The finished card looked like this.

I just added a personalized message to the bottom and it was done!
For my sister's birthday card, I added some balloons and a banner.
You can personalize it however you want!

#14 Kix Garland

I remember seeing Christmas movies where kids would make pretty
Christmas garland with their parents out of popcorn or kix.
So I thought this year Mia might enjoy doing it with me.
At first, I told her to try the kix cereal and tell me if she liked it.
But once she put it in her mouth she spit it out and said she didn't like it.
However, once I told her that her cousins like that cereal she stuffed her 
mouth and couldn't get enough of it!
So, for materials, I used:
A needle
Kix 
String


All I did was string the kix until they reached the knot at the end.

Once done it will look like this!

There you have it!
Two quick, cheap and easy projects!
Tomorrow, I'll have two more projects and will hopefully be caught up!
There's not much time left for Christmas!
Hope you're as excited as we are! 
See ya tomorrow!

Wednesday, December 14, 2011

#9 & #10 Felt ornaments!

Hooray, I'm back with a few more blog posts!
I'm going to have to catch up soon so there will be a lot of Christmas crafts coming your way!
The crafts I'm going to show you in this post are two felt ornaments that I made.
They were pretty easy.
The first ornament is #9 The felt Mushroom Ornament.
First I picked out the colors that I was going to use.
Using a tan felt, I cut out a little rectangle and sewed the edges together.
 I cut out a little circle out of the same felt.

Then I stood up the tube of felt and put the circle on top of it.

After that, I sewed the circle to the tube.

Once that was done, it looked like this!

But you can't have that strip on the side sticking out, so you have to turn it inside out.

And it'll look like this!

Once that's done, you'll need two pieces of red felt cut into large circles and a few little white spots to make the top of the mushroom.

I sewed my white dots on, but it would be way easier to hot glue them!

Then, it's time to sew the red pieces together, leaving a hole large enough for you to stuff it.

Then hand sew that hole once it's stuffed.
Also, stuff the stem with some stuffing.

Then, just hand sew the stem onto the top.

You've got yourself a mushroom!

Hooray, that's done!
Now it's time to move onto
Post #10 The Felt Owl Ornament!

This post is totally easy too.
I got the colors of felt I wanted to use, and cut out the shape that I wanted the owl to be.
Then I cut out a pair of white eyes and eyelashes.

I was still in the sewing mood, so I sewed the eyes on the owl and a beak.
But you could just easily glue on some eyes to save some time.

Then, I used the same scalloping method that I used here
I cut out small circles and layered them starting from the bottom.
I glued those, since sewing would have been time consuming.
Once I did that, I added some wings!
Here are both of the ornaments after I added some string to hang them.


And, here they are on the tree!

I'm not just leaving you with these blog posts.
I might just have another blog post or two coming later on this evening.
Enjoy your Christmas shopping!
I know, I wont!
Was anyone else super excited to go Christmas shopping only to realize that some people somehow turn into trolls during the holiday season?
I learned that the hard way, unfortunately.
But those dementors won't suck away my good spirits!
Harry Potter, anyone?


Wednesday, December 7, 2011

#6 Sewn Garland

Today's craft is very easy and pretty versatile.
It can be used for birthday parties, Christmas trees or just to decorate a room.
I've made some of this sewn garland before. 
If you look closely, you can see it in our title picture up there behind Mia.
All you'll need is a large hole punch, (again) some paper of your choice and a sewing machine.
I got two old books that were falling apart and tore out a few pages.

I liked that the color of the pages differed a little so it would give the garland some contrast.
After I had my pages torn out, I started punching holes.

Then I had some pretty sweet confetti!

Once all of the holes were punched and I had quite a bit of little circles, I started sewing!

It's pretty easy, just sew through the middle of the circle, then add the next.

And keep going...

Until you have a whole bunch of garland done!
You can stop when you think it's long enough and pull out some extra thread if you want to hang it up, just make sure you tie a knot in the end so it wont unravel.
I just kept going until I ran out of circles and it looked like this.

Pretty, right?
I made this garland for our Christmas tree and hung a few strands on our shelves.

There's our Christmas tree and this is what it looks like close up!

Super easy and so cute!
You can use different colored paper for different decorations, you can even use fabric scraps for a reusable garland. You can just change it up however you want to use it.
I'll probably use some for Mia's third birthday party this year.
Can you believe my baby is going to be three this month?
Oh well, just another reminder that time flies by and you have to make the most of it,
especially when you have kids.
Well, that's all for now!
I'll be back tomorrow for some more Christmas crafting!

Friday, December 2, 2011

Christmas post #2 Tis' the season to be jarry.

It's been a pretty gloomy day today.
It's been raining all day and plans to stay that way throughout the weekend.
You know what that means, time to stay inside, wrap gifts, watch Christmas movies 
and if you're me: work on crafts!
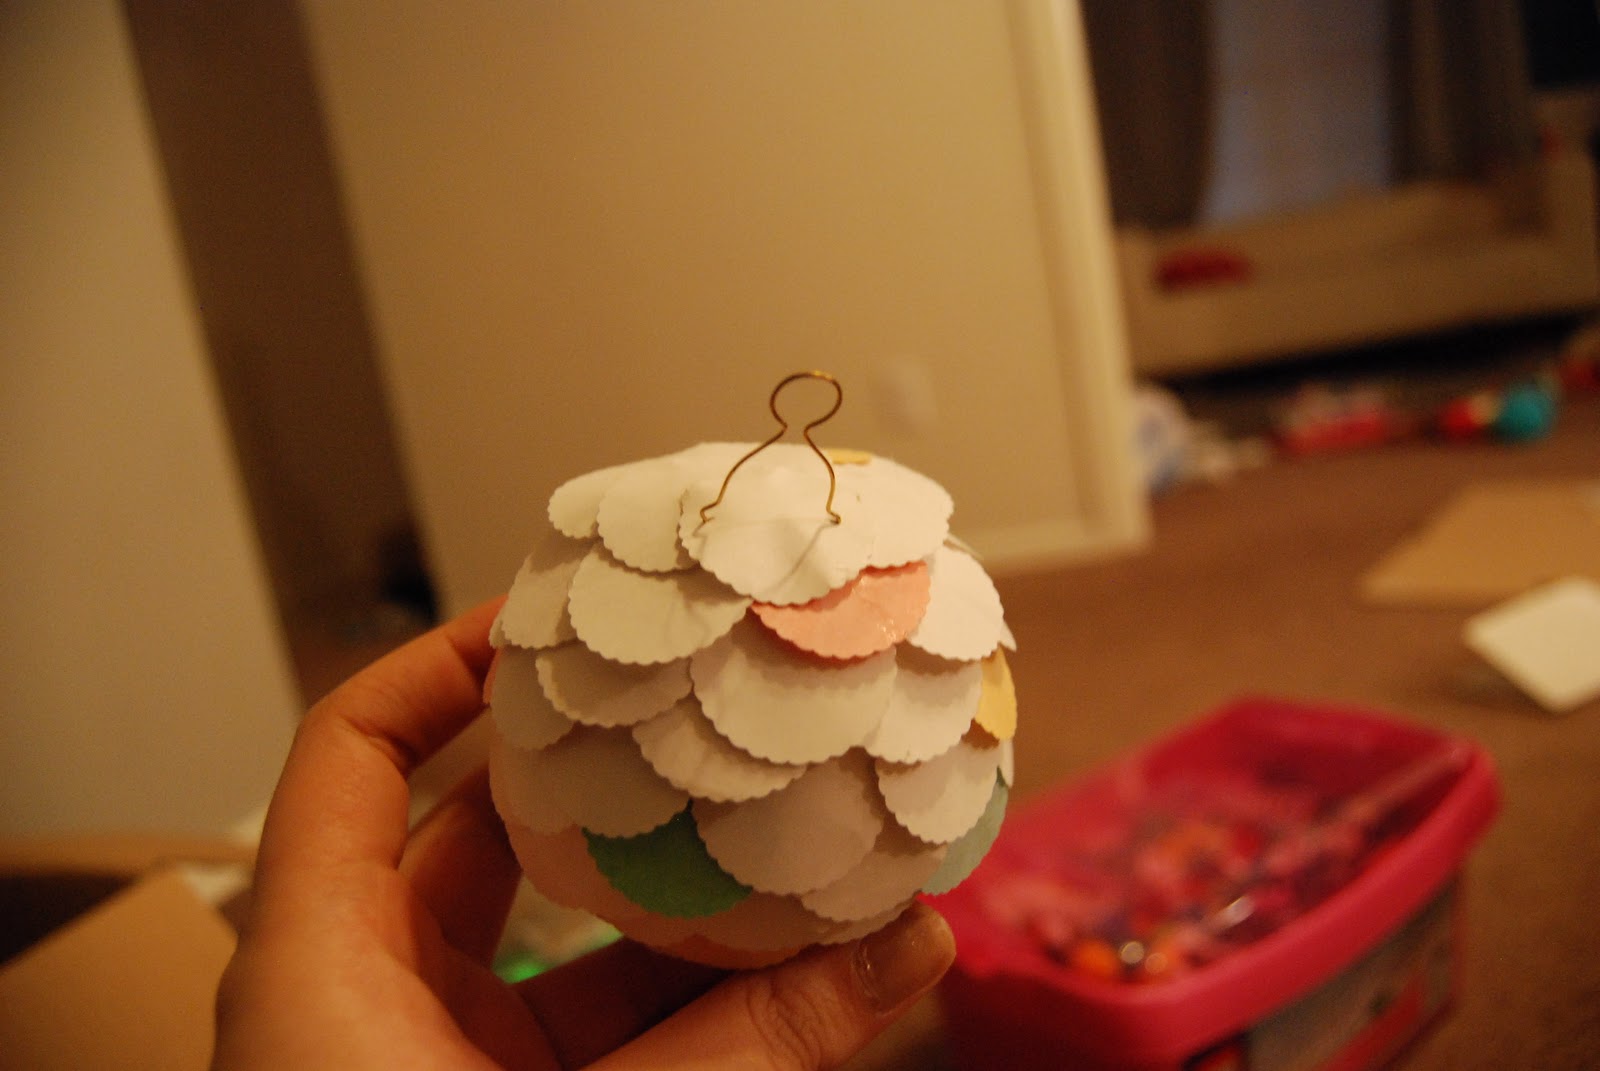
Today's craft is going to be a scalloped ornament.
It's pretty much like the tree's from yesterday, only we're going to be using
a Styrofoam ball instead of a cone!

First, I cut out my circles to layer the ball.
I just used some leftover white paper.
It was my second attempt at leopard print gift wrap gone wrong.

Once I cut them out, I colored a few of them just so the ornament would have some contrast.
Then starting from the bottom, I started layering.
There's no real guide to start with when layering the pieces of paper, but I glued a dot on the top and bottom of the ball to signify where I'd start and end. Just to make sure that the layers stayed even.
 (Not that they stayed even.)

I just eyeballed it when adding the different colors.

Then it was done!

Levi also made one using the paper leftover from our trees.
His came out completely awesome and proportionate while mine... well, not so much.
For some reason he's good at just about everything he tries.
Video games, cards, home remodeling, lego building and now Scalloped Christmas ornaments.
Anyone else notice that?

I wasn't really sure how I'd hang these on the Christmas tree, but Levi had the idea of using the hooks from 
some old ornaments that we had. Yes, he's also resourceful. <3

See that little loop thingy on the top?

Pull the top off, then squeeze the loop to get it out.

Then it's out and you have this weird looking hook type thing for your ornament.

First, I had to find the tops of our ornaments.
 (Which was hard because mine was completely uneven!)
Then I poked some holes with a needle.

As you can see, I poked a lot of holes to make sure mine would hang evenly.
Then I glued the holes with some hot glue and before it dried I inserted the hooks.

Then pushed them in a bit to make sure it wouldn't fall off easily.

Then added some string and hung those babies on the tree!

Pretty simple handmade ornaments and pretty cheap!
We're really excited about Christmas this year.
Mia's learning about Santa Clause and she's also learned a few Christmas songs.
We haven't watched one of our favorite Christmas movies, yet but I can't wait to introduce Mia to it
 and have her love it as well! 
Here's a little taste.


I'm sure you love it too!
Stick around, tomorrow's post is gonna be magical.
I promise, it won't be another scalloped decoration!
Meet you back here tomorrow!
Or Monday, depends on the rain.