I missed you yesterday!
Sorry, it was one of those days when you get a babysitter to go Christmas shopping for your daughter and find nothing that you were looking for!
For some reason that's been the theme of this season.
I can never find what I'm looking for!
Which is the story of these deer!
Christmas blog post #3 Christmas deer.
I had been looking everywhere for some plastic toy deer.
We looked for them at craft stores, hobby stores and thrift stores but we could never find any.
Finally, we gave up our searching and took Mia to Peter Piper Pizza and just as she was
trading in her tickets for some prizes, I spotted them.
The cutest little deer!
Luckily, they were only a few tickets each so Mia didn't mind sparing some tickets for her Mommy.
Once we got those deer home, it was on!
Here they are with a few mini people.
Aren't they cute?
Granted, they do look a bit like moose.
But they're supposed to be deer!
Anyway, I was looking at my favorite website (marthastewart.com) and I saw that she was
glittering her deer.
I had seen some glittered deer at hobby lobby but I didn't like the colors and they were pretty expensive.
So I took Martha's advice and made my own!
We had some spray adhesive and I got some fine glitter.
I didn't want to spray the deer while they were laying on newspaper so we kind of just stuck them onto the exacto knife and sprayed them with adhesive.
Once they were sprayed, we glittered them up!
But we didn't stop there! We glittered up some mini ornaments too!
We sprayed them then glittered them!
Just like that we had some pretty decorations.
Which brings on Christmas blog post #4 The snow globes!
I wasn't sure what I wanted to do with those mini deer.
They were so cute and now so pretty but what can you really do with mini deer besides put them in your very own custom snow globes?
I have pinterest to thank for this.
There are so many pictures of snow globes that people made out of mason jars.
Unfortunately, (keeping with the theme of this season) I found no mason jars at the thrift store.
So I decided to just use whatever glass jars or vases I had at home.
I wanted to make these snow globes look good without spending too much money.
So I went into our bottomless pit of a garage and looked for things I could use.
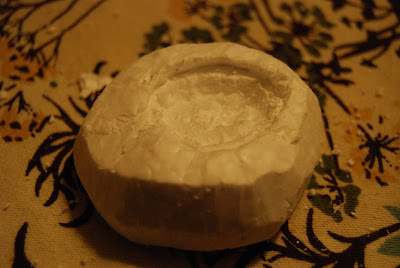
I found this.
Yup, a big ass piece of styrofoam.
I knew that I'd need those little balls to act as snow, but what would cover the bottom of the glass where I'd be gluing everything?
Duh, let's just cut out a chunk of styrofoam that'll fit the bottom of the glass so I can glue everything to it!
So, that's what I did.
This is where those little people from post #3 come in.
I found them at Walmart for $1 per pack.
So four mini people for $2, can't beat that!
Also at Walmart, I found these.
75 cents each, bam, in the basket!
Okay, now back to that styrofoam.
I glued the tree to it, but it wouldn't fit into the jar because the trees are too tall.
so I carved out a little hole for the tree.
Put some glue in, stuck the tree to it and it was awesome.
Then I carved a spot for the deer to go, and it was almost done!
Just added some glitter that I already had, some of those styrofoam chunks, some water.
Then it was done.
Hoorah!
It was so pretty that I decided to make another.
This time I didn't use water because I was using the odd glass thing that I got from the thrift store.
You may have seen it here.
Once again, I cut some styrofoam to fit the bottom.
This time, I used those tiny people.
I didn't like the colors of them so I painted them gold along with some deer.
Then I put my little guy into some styrofoam with a tree.
Put the glass over it, and it was done!
These are my favorite crafts so far.
They're so pretty and they're going to look great once all of my other decorations are done.
The second snow globe is more of a terrarium, but I love it nonetheless.
This blog post is pretty long and crazy, but I've gotta keep up with my 25 posts!
Stay tuned, there's more to come!


No comments:
Post a Comment
Note: Only a member of this blog may post a comment.