
As said before, Halloween is one of my favorite Holidays.
I also happen to love decorating.
I take every chance I get to decorate, however buying decorations at the store
just isn't in the budget for us.
Therefore, I try to keep everything on the inexpensive side.
I have seen so many fall and Halloween wreaths at stores that I was so close to splurging on.
But I just couldn't bring myself to spend $25 to $40 on one.
So I decided I would just make one.
Luckily, there are so many tutorials online and all I would have to buy was a
styrofoam ring for around $5.00 at Walmart.
Materials for this project:
-Styrofoam Ring- $5.00
-Fabric to wrap the wreath - Already had
- Felt- Already had
- Hot glue gun- Already had
My wreath was pretty simple.
First I cut my fabric into strips so that they could easily wrap around the ring.

Next, I begun to wrap the ring.
I glued the end of the fabric to the ring, wrapped the rest and glued the other end.

I continued wrapping and gluing.
Making sure that I kept it tight so the fabric wouldn't sag. (Unless that's what you're into)

Then it was done!
Yep that easy.

Now it's time for the flowers.

I made these pretty flowers out of felt.
Here's he tutorial.

This is just the regular tan colored felt that you can buy at any craft store.
I bought this and a few other colors at Michael's for 29 cents each.
I used four different colors of felt.
You can get about four big flowers out of one sheet of felt and lots of small flowers.

I cut a square out of the felt sheet, then cut a curvy circle.

It's not much of a circle but it doesn't have to be perfect.
As you can see, the waves on mine aren't exactly perfect either.
Next you cut your flower into a curvy swirl.

And keep cutting.
Don't forget to keep cutting the curves!

Keep cutting until your circle is a little bit bigger than the size of a quarter.
There's no definite size, you just have to eyeball it depending on how big or small you want your flower to be.
Keep the circle connected to the strand and start rolling the tip of your strand.

Keep rolling it, keep it tightly rolled.
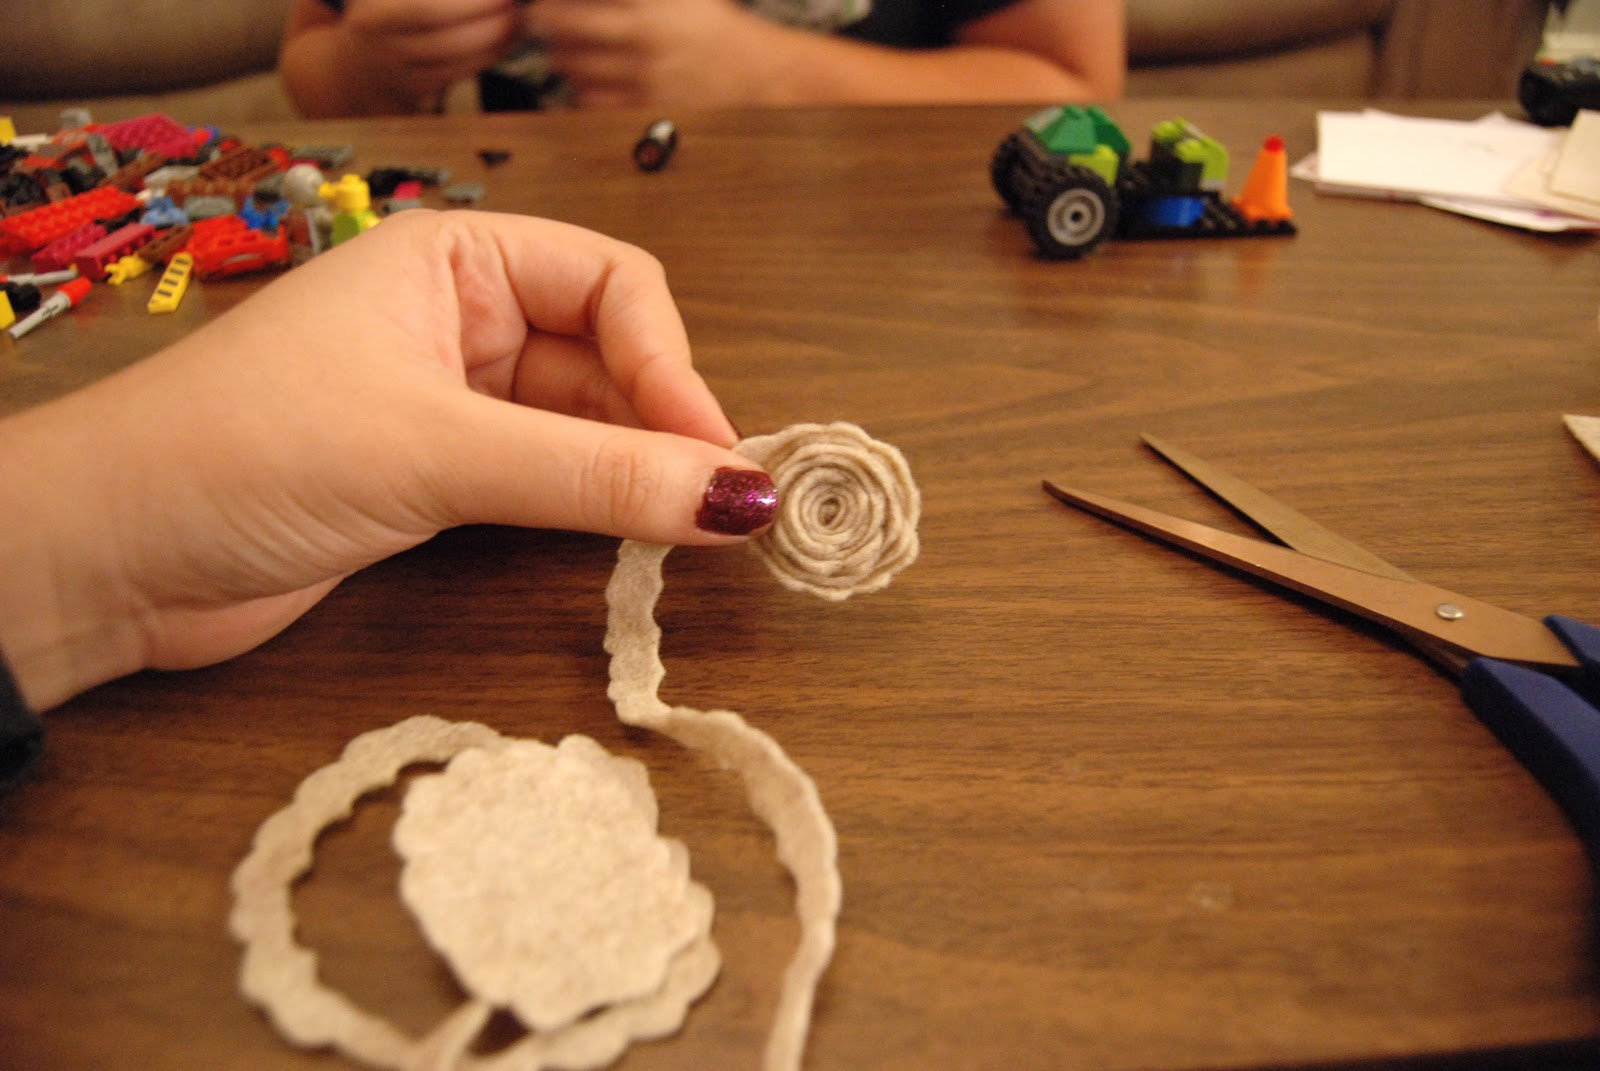
The flower is starting to form and it will soon look like this.

The rolling is done and the base is still connected.
Now it's time to glue it.

Make sure you glue it all over the bottom so that the strand sticks to the base and you wont have strands coming up from the front.
Once the glue is applied, flap that baby over and press it down firmly.

There's the finished flower and a few of the other flowers going on the wreath.

Next I glued all of my flowers into a cluster onto a sheet of felt and cut them out.
I didn't take a picture of this process because well, I forgot to.

I cut out a few black and grey bats out of felt and glued them together to make a small garland.

Then I just applied everything to the wreath.
Along with these cupcake toppers I had leftover from Halloween last year.

Here's the finished product.

The whole process was easy.
However making the flowers was time consuming.
You could also just buy already made flowers but the project cost
would be a little higher.
For me this project costed just $5.00
The felt flowers can be used for just about anything.
I glued some on hair clips for Mia.
I hope you enjoyed it!
*Also, you may have noticed the Lego scene behind the flower tutorial and this just about sums up what was going on that whole time.


Daddy trying to put the Lego's together for Mia and Mia trying to help.
LOL! Carissa! You crack me up! Making sure that I kept it tight so the fabric wouldn't sag. (Unless that's what you're into) HAHA!I miss you!
ReplyDeleteI miss you too Tiffany!!
ReplyDeleteI never knew how to make those flowers! Thanks for sharing, now I'm heading to michael's after work to get some felt! :)
ReplyDeletexo Catharine @ Your Modern Couple